Burger Smasher & Patty Mold Kit
Burger Smasher & Patty Mold Kit
Couldn't load pickup availability

Burger Smasher & Patty Mold Kit
Your Burger Night, Two Ways
Some evenings call for a thin burger on a flat griddle. Others start with a carefully shaped patty, ready for your favorite cooking method. The Burger Smasher & Patty Mold Kit brings those two approaches together without asking one tool to do both jobs.
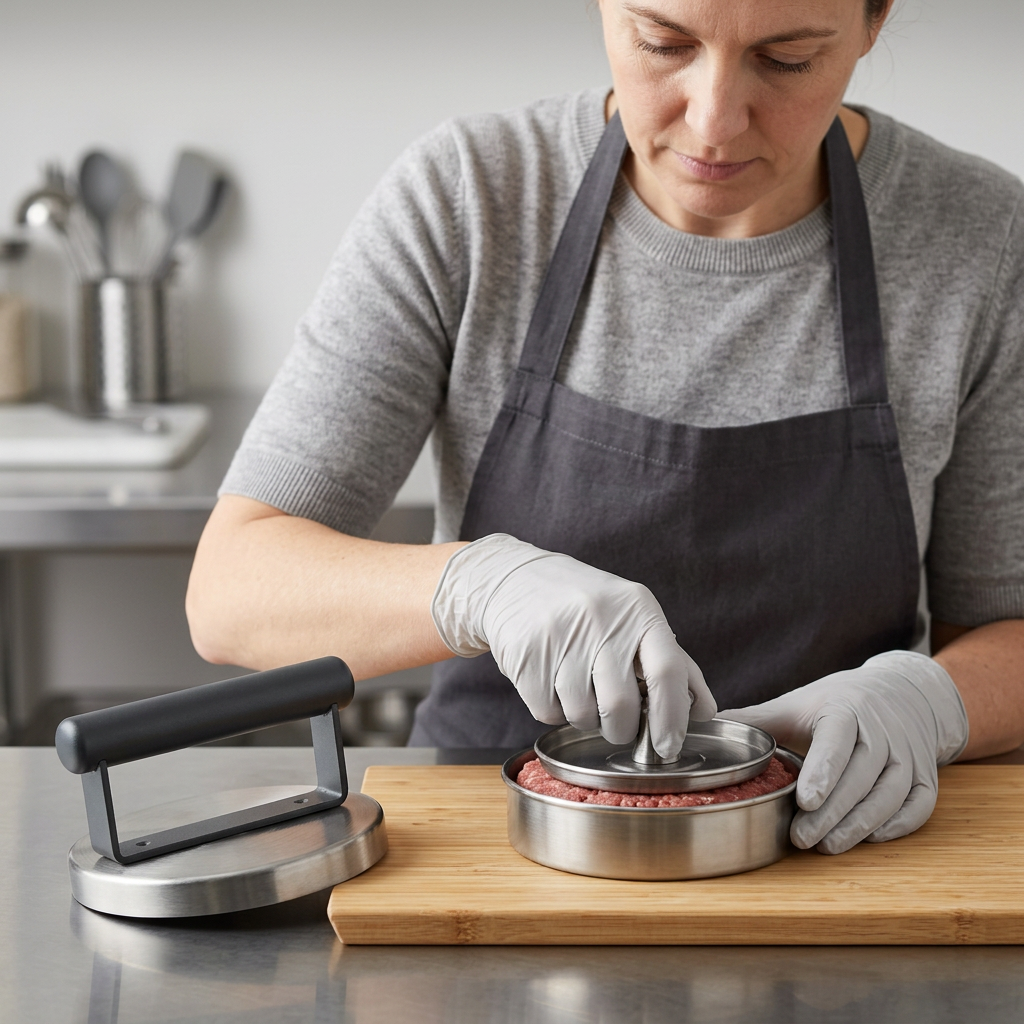
A round smasher with a charcoal-colored horizontal handle is paired with a separate circular patty mold and removable knob-handled plunger. The coordinated metal appearance keeps the setup simple, while the different working shapes make each component's role clear. Choose your approach, organize your ingredients, and make the preparation part of the pleasure.

🧑🍳 Route One: Shape Before You Cook
Start at a clean preparation station with the round mold. Place a suitable portion of your burger mixture inside the ring, position the removable plunger above it, and press down using the central knob. The surrounding ring defines the outline as you shape the mixture.
The result depends on what you put in and how firmly you press. Adjust the portion to your recipe rather than overfilling the ring, and release the shaped patty carefully onto a clean preparation surface. If you are making several, divide the mixture into comparable portions first to keep your preparation consistent.
This is the slower, more deliberate side of burger night: seasoning ready, ingredients in order, and each patty prepared before you move to the cooking area. Keep raw ingredients chilled appropriately, and clean your hands, tools, and work surfaces before moving on to buns, salad, or other ready-to-eat food.

Route Two: Press on a Flat Cooking Surface
The separate smasher has a round pressing base beneath a raised horizontal handle. Its form lets you apply downward pressure from above when making a smash-style burger on a suitable solid griddle. It is a pressing tool, not a spatula: use your own appropriate turner to release, flip, and serve the food.
Prepare your cooking area before the food reaches the surface. Keep the turner, clean serving plate, and appropriate hand protection within reach. Position the smasher over the portion, hold the handle securely, and apply controlled pressure according to your recipe. Keep your hand away from the hot plate and any splattering fat.
Use a solid, stable cooking surface rather than pressing food down between open grill bars. Follow the cookware manufacturer's instructions, and do not leave the smasher sitting unattended on the heat. The metal base and handle assembly can become hot during use.

Three Working Components, Clearly Defined
- Round burger smasher: A circular pressing base with a raised charcoal-colored handle supported above it.
- Circular patty mold: A separate ring-shaped form for shaping a burger mixture at your preparation station.
- Removable plunger: A round insert with a central metal knob that fits within the mold for downward pressing.
The smasher and the mold are separate tools. The mold ring is not an attachment for the smasher, and the knob-handled plunger belongs with the mold. That distinction lets you keep preparation and cooking tasks organized rather than improvising with mismatched pieces.
Let the Menu Set the Mood
Build a classic plate with toasted buns, sliced pickles, and a simple sauce. Or put out different toppings so everyone can finish their own burger: crisp lettuce, sliced tomato, grilled onions, and a favorite cheese. The tools take care of shaping and pressing while the combination of ingredients remains entirely yours.
For a relaxed gathering, prepare a clean serving area before you begin cooking. Keep raw patties on a separate tray, bring cooked burgers to a fresh plate, and avoid returning utensils that touched raw food to ready-to-eat ingredients without washing them first. A thoughtful setup leaves less to juggle when the griddle is busy.
What This Kit Does Not Include
This listing includes one burger smasher and one patty mold with its removable plunger. Griddles, spatulas, gloves, boards, plates, food, and other styling accessories shown in the photographs are not included. This is a manual tool kit, not a heated appliance or a burger-cooking machine.
Keep Technique and Care in Balance
A pressed shape or browned surface does not confirm that a burger is cooked through. Use a suitable food thermometer and follow food-safety guidance for the ingredients you choose. Keep the cold-preparation mold at your prep station; it does not need to sit on the cooking surface.
Allow any heated component to cool before cleaning. Separate the plunger from the mold, wash each piece with mild dish soap and a soft sponge, and pay attention to edges, joins, and the area beneath the knob. Rinse and dry thoroughly before storage. Avoid abrasive scouring and prolonged soaking.
Store the clean, dry components together so the next burger night starts with a clear choice: shape ahead, or press on the griddle. Two approaches, one coordinated kit, and plenty of room to make the meal your own.